RBEMR

RBEMR a 1993 BMW K100LT - new to us 2012 and my other motorcycles

Thursday, August 22, 2013

A Summer of Two Wheels

This was to be a summer of big plans and big rides.  So far its working out just fine.

June...an trip through the back roads of west central Idaho with my son.  Its good to have a second bike.  I trucked the two KLRs over to Spokane where we started what was to be a fishing/camping trip, but turned out to be less fishing, good camping, and lotsa riding.  Part of the trip was to hit Enterprise, OR for the Hell's Canyon ADV Rally. 

By the time we hit the Rally, we had already put on 800 miles of back roads, snow bank turn-arounds, rain, sleet, mud, wrong turns and fast-slab-work-arounds.  In all, it was 1,100 mile by the time we hit home again (my son's home in Spokane).

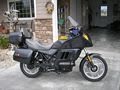
July...another good reason for a second adventure bike.  Been telling an old work partner from our years in Florida whom I  had shared a couple of diving/camping/canoing trips to try his hand at ADV riding. 
He had never been to Montana, but did have some past history of riding in the deserts of California when a lot younger.  Needless to say, after another 1,100 miles, he now has an inside view and experience of Montana.  I set up a Ghost Town Tour and we hit a lot of ghost towns...of course by dirt...the hard way.  Garnet, Marysville, Elkhorn, Pony, Virginia City, Nevada City, Bannack, Coolidge, and a lot of old mining interests in between. 
No snow this time, but some really tough trails did turn us around and we had some incredible experiences both riding and just enjoying the scenery.

And not to forget the Beemer.  Immediately after returning from the Ghost Town Tour, I loaded up the K100LT BMW for camping, including my Granddaughter Shelby for her first long distance motorcycle ride/camping excursion.  No dirt this time, but three days of riding and two nights camping over in the back highways of eastern Idaho.  We had a great time.  Another 500+ miles.

Tim also greatly increased his skill and expectations of Montana adventure style motorcycling.  I'm sure he is still day dreaming of the night watching the rain squalls, sunset, and clear view of the Milky Way lounging around the dwindling campfire near a pristine high mountain lake up in the Gravelly range. 


I wasn't easy on him and he held up to his Marine pilot mystique.

Looking forward to my big group ride of the summer next week.  I've been collaborating with a co-adventure rider from the Seattle area to semi-duplicate what is becoming and annual event to ride some of the best that Montana and Eastern Idaho has to offer.  The Best of Montana 2013 will be another epic event.  Added a new plastic tank to my KLR, new back tire, new rear brake pads, sort through the camping gear and I'm ready to go again!!!  Ride report here.

So far, three full on adventure rides on back roads well in excess of 3,000 miles.

Then there comes the September Legend of the Fall ride of similar proportions...

Well, Now its late October and the back roads travel season in Montana has come to a close. I rode up to Twin Lakes on the Lost Horse Road Saturday with a weather forecast of snow and wind for Sunday.  22 degrees when I left home and met three other intrepid riders for a 100 mile loop.  The sky was crystal clear and the temperatures climbed into the 50s by the time we returned to civilization.

But backing up a month to September I road the Legend of the Fall (LOF) with a bunch who started from Jackson Hole, WY.  Rather than deadhead from home to Jacks Hole, I opted to solo for two days down through the back roads of Idaho. From Darby I traveled up past Painted Rocks Lake and over Horse Pass. 

A slight side trip up on top took me to Horse Hot Springs, a place I had been trying to get to for the last three years, but had been turned back the previous two years by fires.


Nice warm plunge and I was off to Shoup Idaho.  Shoup is a small remote "village" on the Salmon River known for its unique gas pumps.  I needed no gas, but did partake of a burger and shake.


From there I traveled a bit farther turning south on Panther Creek Road and another 50 miles to camp for the night up in the hills south of Salmon, Id.


The next morning I het the road for Salmon, gassed up and took off for Lemhi pass with another stop for a hot springs - Starkey Hot Springs.  Starkey HS is maintained by the BLM and is a very nice setup with two cement pools, changing rooms, etc.  Very nice and another chance to soak off some road dust.


From the hot springs my trusty steed and I traveled up over Lemhi Pass stopping long enough to check out the Sacagawea Memorial where I had the opportunity to change the tube in my rear tire.  A fold in the tube had worn. 

45 minutes later, I was on the road east heading for the Bloody Dick drainage and Reservoir Lake Campground where I would meet up with the full group.

Timing was great.  I was still sitting on the KLR when the rest of group came trickling in over the hour.

The full report for the LOF 2013 ride is located HERE. I road with this great bunch north up through the Sapphires, east over through Anaconda and Butte to Delmoe Lake then south past Pony.  Next was Ennis and entry to the Gravelly range.  My third time this summer for me.  A fast run up at 9,500 feet  as thunder storms were threatening and riding the top country above the tree line is nowhere to be when thunder storms threaten.

Next stop was Island Park, ID. where the ride leader had a cabin.  Plenty of adventure, but now it was time to head home. 

The next day I headed back towards home and the rest on back to Jackson Hole.  Many of the riders had trucked their bikes up from Texas.  One rider road the whole ride with a broken leg/ankle he acquired on the first day.  Tough old buzzard.  Took two of us every morning to help him get up on his bike.

I continued on past Henry's Lake and the Red Rock Road on over to Monida on Interstate 15.  A quick run up to Lima and Dell then onto the Medicine Lodge Road north.  I spent that night at Bannack which had just re-opened from a flood back in July.  The last day was all pavement as I was eager to get home.  In all another 1300 miles. 


This easily put me over 5,000 miles of back country touring in four months mostly in just 4 major rides.  I couldn't believe I had done this much riding in one summer and it just makes one want to travel even more. I saw new country, but more important I saw even more empty stretches that need to be explored in the future.  Now I'm waiting patiently (?)for next summer.

Monday, March 11, 2013

To CARB or Not to CARB!!! NO, not the Beemer, the KLR

Along with the BMW, I have two Kawasaki KLRs.  My 2000 is my main back road mule and we spend lots of hours, no days cruising the many backroads in this country.  Reliability is manadatory, but the KLR package is a perfect platform  for modifications and fun and easy to modify and fun to ride.  It has some signifcant suspension mods, electrical mods, luggage mods, ergonomic mods...and now carb mods.


Winter maintenance season for motorcycles and boredom can take you strange directions.  I made the mistake of locating a Mikuni VM38 direct pull carb and throttle assembly on Ebay which stated that it was part of an old kit for KLR 650s to replace the Keihin CVK 40 factory carbs.  OK, I took the bait.  Now where to start. 

First of all, the existing CVK carb has been performing well.  This bike, a 2000 with 28,000 miles runs well, starts very easy with nothing more than minor concern for choke hot or cold.  The engine is original with no mods other than the typical doohickey and carb needle shim and drill routine.  Very reliable, takes me on some amazing multi-day backroad adventures in MT and ID. So I start by questioning why should I even do this?  I finally had access to the KLR's carb when I had the tank off doing my winter valve clearance check.  So off comes the CVK so that I can eyeball the Mikuni in its place and compare dimensions.

The snorkels on each end where just a minor bit smaller circumference, but the clamps and rubber boots would clamp down sufficiently.  So much for that step.  However, judging from the overall length of the Mikuni, it would be problematic to install and possibly require modification to the air cleaner side, unless....after looking at the carb...one where to cut the air cleaner side of the Mikuni's snorkel back to roughly the overall front/aft dimensions of the CVK.


Commitment time...to cut or not to cut.  Do I really want to do this?  will I destroy the carb?  In for a penny, in for a pound.  Get out the Dremel and a cut off disc.  Now I'm really committed.


Back to fitment.  The Mikuni slips in remarkably well.  It is taller and I have some concern for the clearance between the starter and the bowl jet access screw plug.


Close, but doesn't touch.  Now for the plumbing and a question of petcock vacuum.  The KLR's fuel petcock is vacuum operated and some people replace or bypass the vacuum operation.  Normally, the petcock is off unless the engine is running and generating a vacuum signal to open the flow of fuel.  It has been a problem for some resulting in some block off kits or replacement with non-vacuum petcocks. I personally like the vacuum operation as a manual petcock must be turned off every time you stop (and you must remember to turn  it back on when resuming your ride).  If the carb float needle where to stick (I have had this happen!) then the over flow can flood the engine and even dilute the crankcase oil.  Not good.  So where does one find a vacuum port?  The Mikuni does not supply one as delivered. 


More carb modification is required.  I located a thicker circle of material on the left side of the engine end snorkel which looks like it may be thick enough to drill and tap a hole for a vacuum port nipple.  Off to NAPA and a brass 1/4 inch nipple.  I drilled the location, tapped it out, but had to rough machine the brass nipple threaded portion down to the correct size, tapped it and away we go.  I used a drill and file as my lathe.  A little red Loctite for security, after trimming the length of the nipple threaded portion so that it would not protrude beyond the interior of the bore.  Next step, throttle cable.


The dimensions of the throttle cable were outer sheath total length – 42” Includes in line adjuster and the inner cable total length – 48 3/4”.  About perfect as I was soon to discover.  The OEM throttle mechanism is a push/pull type with two cables operating a bell crank on the side of the CVK carb, none of which is compatible with the Mikuni.  I removed the OEM mechanism, the hard part being removing the grip and the grip heater element.  The mirror mount/cut-off switch had to be slightly moved to accommodate the 90 degree throttle assembly, but every thing fit with minimal effort, even re-installing the heating element.
The Choke:  The OEM choke on the CVK is an enricher circuit which is cable actuated from the left side of the handlebar.  The carb attachment is a plastic device known to break and cause untold headaches. It is difficult to remove and re-install on the carb for routine carb maintenace.   There are known kits to relocate the the actuation mechnism either directly to the carb or under the tank. 

The Mikuni choke is also an enrichment circuit mechnism, but the actuator is a lever mounted direclty on the plunger on right forward part of the carb actuated by a lever reaching over and accessed from the left side of the carb.  Almost impossible to access in this installation due to other paraphanelia located below the tank.  Ah-But... if the mechansim can be turned 180 degrees, it would move the lever to the right side where there are no impeding items.  The result, you can access the lever extremely easily just under the right side edge of the tank yet tucked in far enough to be safe.  You can even reach across the tank with your left hand to tun it off or on.  Super easy, and far better than the original or even the modified CVK after market fixes, AND no more cable to deal with, oil, maintain, etc.  Love it!

But will it run???  As this project proceeded, eating into the back of my mind was "What about the jeting?"  Good question. Throughout this project I was searching the Web for infomation that would guide me.  I found very little.  I did find an SV500 forum where some inmates had mounted Mikuni 34 and 36 style carbs and those machines where similar thumpers so that at least supported my basic thoughts.  The Mikuni came with a 330 main jet and a 5-30 pilot jet.  I never pulled the needle jet and I don't recall the number on the needle itself.  Other research indicate that this jetting combination was pretty standard for shipping the Mikunis for after market purposes.  But again will it run???  Time to see.

I pulled the vacuum line off the petcock and provided some "artificial" vacuum just to fill the carb.  Time to hit the starter.  IT RUNS!!!  First step, set the idle to around 1100.  Now play with the idle mixture screw for max idle.  This is an air bleed and if you move the screw out, it will lean the mixture.  I had to run the screw out 3 turns to get any adjustment to the idle.  Note: the idle mixture screw holds its position due to an internal spring.  If the screw is rotated out beyond 3 turns, the spring no longer applies pressure and the screw can turn on its own due to vibration and fall out.  So, I will definitely need a leaner pilot jet, but its running so now to the next jetting step. 

First a primer on basic slide valve carb jet circuits.  The pilot jet circuit provides fuel metered during the first 1/8th to 1/4 of the slide valve movement.  From there the needle jet and the needle itself becomes the primary mixture mechanism from roughly 1/4 to over 3/4 throttle setting.  The main jet comes into play primarily at the 3/4 to full throttle settings.

Time for a ride.  It idles OK.  First trip down the street, the response is great, but I'm getting some blubbering at mid throttle and above.   Back to the garage and lower the needle.  this helps the mid range, but at the 3/4 to full range bogs and blubbers badly. The idle to mid throttle is really good though so things look promising.

Jets, jets, and more jets.  I ordered four mains and two pilots.  I ordered from http://www.partsreloaded.com/ who gave excellent and responsive service.  The original pilot jet was a 5-30 and I ordered the next two leaner jets, a 5-25 and a 5-20.  Once delivered I installed the smaller one (5-20).  With this pilot jet, the idle mixture screw adjusted for best idle at 3/4 turn.  1 1/2 would be the sweet spot, but 3/4 will work and the next time I drop the bowl, I'll install the 5-25.

The main jets I ordered where a 300, 310, 290,  and 280..  None of these were lean enough although I could see a definite trend to the better with each leaner jet.  New order, this time I jumped to a 260, 250, 240, and 230.   The 230 ended up being the closest thus far.  I could use a leaner jet yet, especially if riding at higher altitudes, but it is pretty good now. 

I ended up with the 5-20 pilot jet at 3/4 turns out on the mixture screw.  The needle at the middle grove, and the 230 main jet.  I will be ordering a couple more leaner man jets, but I pretty happy with the results as they sit.  The throttle response is definitely better.  Power, well that's never been the strongest point on a KLR, but it feels a little stronger.  The response to a twist of the wrist is smooth defintite with good power down low.  I run a 16 tooth primary on this bike.  She did almost touch 90 (indicated) with a strong side wind and I have a very tall wind screen and add a good 250 lbs and 6'4" height. The rest of the bike's engine mechanics is stock including the muffler and air intake system.  If those were modified, the jetting would probably be spot on or possible slightly lean.  I did try riding with the air cleaner cover off and on just to judge the change and analyze the jets during testing (probably leans the mixture one or two jet sizes by running with the cover removed).  Yes the air cleaner was freshly cleaned (original Kaw).

Overall impressions:  This was an easy conversion with no major glitches of install problems.  The easy of access to the Mikuni (compared to the Keihin) is great.  I can access the carb bowl and internals without having to remove the tank or anything else.  It provides the ability to rotate the carb and access the bowl area without removing the tank or any other components. You do have to first rotate the carb to the right and remove the slide assembly before rotating back over to the left – easy enough, but there is a procedure regarding re-assembly getting the needle to enter the needle jet when not held vertically. I lift up the slide spring pulling it out of the way over the edge of slide, remove the needle retaining clip and let the needle float up as I slowly ease the slide back in. Once the key way is engaged on the left side of the slide, the needle will drop done and into the needle jet. Reinsert the keeper and release the spring to hold the keeper, screw on the top, rotate the carb to vertical, check the cable positioning by feel (under the tank), tighten the bore clamps and your done. A process that would be easier with smaller hands and maybe a couple of extra fingers. At least you don’t have to fight with the rubber boots removing the full carb, but if you do, its still much easier than the CVK.

The Mikuni can be further tuned by changing the needle and/or the needle jet, something I didn't feel I had to do.  A different cut out on the slide can also affect the mid range performance.  Different slides are available and I found in my searches that some people even trim them themselves.

A portable O2 analyzer would be nice.

No, I did not check my spark plug for color.  I'm squeaking up on the jetting from the rich side so I'm not too concerned with an over lean condition and would like to favor a slightly rich side anyway...besides, that would mean taking off the tank to access the spark plug.

Although not too difficult, this is proabably not a mod for the new mechanic.  I like the simplicity of the carb and install and I like to tinker, what can I say?

Hints & tips:  Try running with the air filter cover on/off to test.  Runs a little more lean with the cover off.  Mark your throttle tube with off, 1/4, 1/2, 3/4, full white marks to assure you are really testing a certain range.
 Resources: 
Mikuni Carb Tuning Manual
Tuning Mikuni Carbs
Slide Cutout Tuning

Follow up notes:

Current Jetting specs:
Needle jet - 166 Q2
Needle - 6DP   2nd groove 1st (top)
Main jet - 220 210 200
Pilot jet - 25 (air screw 1 1/4 1 3/4 turns)
3/21/2013 4/26/2013 10/24/2013 7/14/2014

Fred Hink of Arrowhead Motorsports in Moab has been monitoring my progress and is assembling a kit to accomplish the Mikuni carb swap.  His planned kit includes a Mikuni VM38 carb, throttle assembly/cable, and set of jets.  Fred thinks the install can be accomplished without the trimming of the carb inlet bell as I did.  I am sure he will supply a good set of instructions (along as an independent tuning regimen to avoid the long jetting trial and error I encurred).   I also have to blame Fred on my project as he, through the DSN_KLR650 forum, is where I first heard of the possiblities of this conversion.

New note: Fred now is listing his KLR/Mikuni plug&play kit on his website.

4/26/2013
Weather is finally such that I got to thrash the bike out on some rough, twisty, backroads.  First I swapped the main jet down to a 210 and dropped the needle to the second notch. Only a 5 minute job then off for a ride.  The biggest change I could detect was the smooth low rpm operation.  Situations  were I would have been shifting now the bike pulls much more smoothly and stronger down as low as 2,000 rpm and pulls strong on up from there.  This along with the fast and smooth throttle response make this project a winner.  Mileage so far is about 45-46 mpg, but that includes mostly high speed highway with richer jets.  So far better, smoother, low rpm, super throttle response, and especially easy to access & tune.  Well worth the effort.

6/23/2013
Long haul report:  Completed a 1070 mile mostly back road trip in the Idaho mountains over 8 days/7 nights loaded for camping.  The bike performed perfectly with absolutely no hickups.  Just a bit over 50 mpg.  Second bike was my 2002 pretty much stock except for the 22 cent mod, slide drill, and idle mix set a little richer (CVK) which got just a smidge under 50 mpg.  Ranged from over 6,000 feet to 1500 feet (several cycles).  Weather from hot, to cold, sun, snow, and even a little hail.

8/23/2013
Really long haul report.  I've completed 3 1,000 plus mile rough back road week long trips this summer with narry a boble from the VM carb.  Zero problems and over 5,000 total miles.  At higher elevations, there is a noticable loss of power (9,000 ft), but that would be the case with the regular carb as well.  The main could still benefit from a slightly leaner main jetting.  I have to force the bike at lower rpm/absolute full throttle to detect any rich burble.

10/29/2013
The season is about over for 2 wheels in Montana. Took my last mountain ride with friends last week end.  The Mikuni has performed flawlessly all summer/fall. In September I capped off my last "long" ride.  1300 miles starting out with two solo days down through back country Idaho then swinging back over into Montana to meet up with a bunch of riders, mostly from Texas, who started out in Jackson Hole and were looping around the state. Again I traveled the high and mighty including above 9,500 feet in the Gravellys. I departed the group in Island Park and road two days back to Stevensville solo. Never had to access he carb although you could tell at altitude it may have benefitted from a slightly leaner main and needle or needle jet. It was nice to know I could tweak the carb very easily even if I didn't have to. 

07/14/2014
Finally got around to changing the main jet down to a 200.  Totally cleared up the slight full throttle bob.  First time I've opened the carb in a year.  
Did this as part of a second VM38 conversion to my second KLR, a 2002. I found a VM38 on Ebay last winter for $39.  A little rough so it needed some good cleaning and some rebuild parts including a new bowl gasket, needle/seat, and of course, new jets to match my original.  When I finally started working on the carb, yesterday, it didn't take long to prep the carb. Install the new jets and other new parts. Today, I drug out the throttle cable and grip assembly to do the install.  Found the cable had a too short inner cable. Darn, I need the bike for a ride the end of this month and didn't want to wait for a new cable, plus I couldn't find the dimensions I needed other than a custom order, soooo off to YouTube to learn how to cut and rebuild cables.  Ended up using a wood block mold to create an embedded end connection which worked very well.  It took less than two hours to strip the KLR of its tank, carb, cables (including choke) and throttle assembly and install the new carb/throttle assembly.  Using my previously identified jet/needle settings, the result was spot on.  Just fine tuned the idle jet and speed.  Runs great.  Less than $90 invested. I could sell the old take-off carb/cables for much more.

8/4/2014 
Just got back from a 2,000 mile back roads trip through Western Montana and East Central Idaho.  Both bikes performed flawlessly.  The No. 2 bike had the carb installed only days before the trip.  Hit elevations from 2,000 feet to just below 9,000 feet -  repeatedly. A bit rich at wide open throttle, but that is a rare operating condition. Gas mileage was just a hair below 50 MPG with 300# plus of rider and gear, large windscreens, big up hills (and downs).